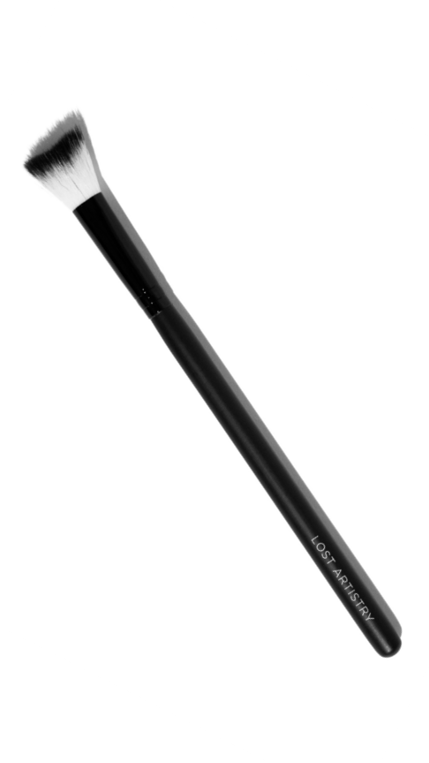
Properly disinfecting your Lash Cleansing Brushes between services with clients is crucial to maintain a clean and hygienic lash experience. Here's a step-by-step guide on how to do it:
Materials Needed:
- Dish Liquid
- Antibacterial brush cleaner or alcohol-based solution (at least 70% alcohol)
- Tissues or paper towels
- Small bowl or cup
- Clean, dry towel
- Optional: Disposable makeup brush cleaning wipes
Step 1: Prepare the Work Area
We suggest disinfecting your lash brush near a sink. Ensure the surface is clean and clutter-free. Lay down a clean towel beside the sink to place your brushes on during the cleaning process.
Step 2: Gather Brushes
Collect the used brushes that need to be disinfected. Always keep them separate from your clean brushes.
Step 3: Wash your hands or wear gloves
You will need clean hands for Step 4.
Step 4: Remove Excess Makeup and products from the brush
Liquid dish soap can efficiently remove makeup residue from the cleansing brush. Apply some dish soap and water to a sponge or the palm of your hand and begin to work the makeup and residue out of the cleansing brush. Continue working out the residue in circular motions until makeup is no longer visible in the brush bristles. Once the brush has been thoroughly cleaned, rinse the brush with lukewarm water and wipe it down with a towel (do not submerge brush in water).
Step 5: Pour Disinfectant Solution
Pour a small amount of the antibacterial brush cleaner or alcohol-based solution into a small bowl or cup. Make sure the solution is deep enough to submerge the bristles of the brushes.
Step 6: Dip and Swirl Brushes
Dip the bristles of each brush into the disinfectant solution. Swirl the brush in the solution for about 15-30 seconds to ensure that the disinfectant reaches all parts of the bristles. DO NOT SUBMERGE THE FULL BRUSH IN SOLUTION, only cover the bristles.
Step 7: Pat Dry
Carefully pat the brush on a tissue or paper towel to remove excess disinfectant solution. Be gentle to avoid damaging the bristles.
Step 8: Optional: Use Disposable Wipes
If you have disposable makeup brush cleaning wipes, you can use them to clean the bristles further. Wipe each brush thoroughly to remove any remaining makeup residue.
Step 9: Reshape Brush
Reshape the brush bristles with your fingers to restore their original form. This is important for maintaining the effectiveness and longevity of the brushes.
Step 10: Air Dry
Place the cleaned and reshaped brushes on a clean, dry towel to air dry completely. Ensure that the bristles are not in direct contact with the surface to allow for proper ventilation and to prevent solution from pooling near the bonding point of the bristles. If water or solution sits around the bonding agent between the bristles and the brush handle, the bristles will potentially loosen and fall out.
Tips:
- Avoid submerging the entire brush, especially near the ferrule (metal part), as it can damage the glue that holds the bristles.
- Regularly clean your brush storage containers to prevent the growth of bacteria.
By following these steps, you can maintain a hygienic makeup application environment for both you and your clients.
Preventing the bristles from falling out:
Makeup brushes can lose bristles when soaked in water for several reasons, and understanding these factors can help you take proper care of your brushes to prevent damage. Here's a breakdown of why cleansing brushes may lose bristles when submerged in water:
- Glue Dissolution:
- Issue: The glue that binds the bristles to the brush handle may dissolve when exposed to water for an extended period.
- Result: This can cause the bristles to become loose and eventually fall out.
- Swelling of Wooden Handles:
- Issue: If the brush handle is made of wood, prolonged exposure to water can cause the wood to swell.
- Result: As the wood expands, it puts pressure on the bristles' attachment point, leading to the weakening of the glue bond and potential bristle loss.
- Ferrule Damage:
- Issue: The ferrule, which is the metal part that connects the bristles to the handle, can also be affected by water.
- Result: Rust or corrosion in the ferrule can compromise the integrity of the brush, leading to bristle shedding.
- Aggressive Handling During Cleaning:
- Issue: Rough or aggressive cleaning methods, especially when wet, can weaken the bristle-to-handle bond.
- Result: Excessive force during cleaning can cause bristles to loosen and eventually fall out.
- Use of Hot Water:
- Issue: Hot water can accelerate the breakdown of adhesives used in the brush manufacturing process.
- Result: Using hot water may expedite the weakening of the glue bond, leading to bristle shedding.
Tips to Prevent Bristle Loss:
- Avoid Soaking Entire Brush: Instead of submerging the entire brush, focus on cleaning the bristles with minimal water exposure to the handle.
- Use Lukewarm Water: If water is necessary, use lukewarm water instead of hot water to minimize the risk of glue breakdown.
- Gentle Cleaning: Be gentle when cleaning your brushes, especially when they are wet. Use a mild soap or brush cleaner and avoid aggressive scrubbing.
- Proper Drying: Ensure brushes are dried properly after cleaning by reshaping the bristles and allowing them to air dry completely.
- Regular Maintenance: Regularly inspect your brushes for any signs of wear or damage, and address any issues promptly to prolong their lifespan.
By being mindful of these factors and adopting proper care practices, you can minimize the risk of bristle loss and extend the life of your makeup brushes.


